Probably the cheapest way of making amiibo clones.
Amiibos are the NFC-enabled figurines and cards manufactured by Nintendo. There is a lot of games for Wii U and Nintendo 3DS which use amiibo in a number of ways. Learn more about amiibo on Nintendo site
Nowadays there is more and more games appear which annoyingly ask the player to buy new figurines. It’s more comfortable and fun to play! — they say. Other games went even farther and don’t work without amiibos at all.
If you’re a collector and don’t mind spending 10-15 bucks on another figurine then you can stop reading right here. This article might be interesting for more practical and thrifty readers who would like to get familiar with amiibo but don’t want to spend a lot of money on a collection of certainly beautiful but pretty useless things the main purpose of which is to collect dust on shelves.
And probably you’re trying to protect your amiibo figurines so hard that you don’t want to touch them at all. Then this article may be useful for you! You will be able to make the exact copies of your figurines and play with them, while the originals are kept in a safe!
Interested? Then let’s do it!
Ready-made amiibos
Luckily there are ready-made sets available online:
First let’s check that we have all the tools required:
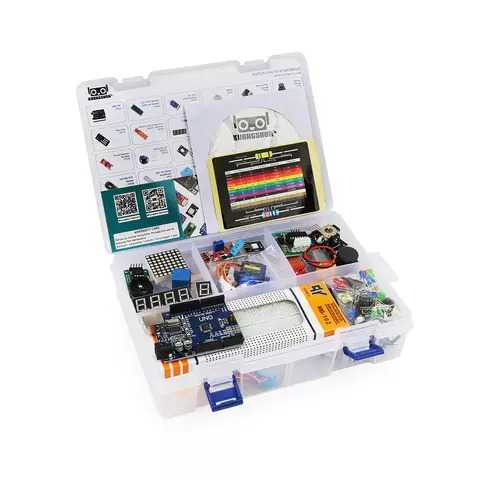
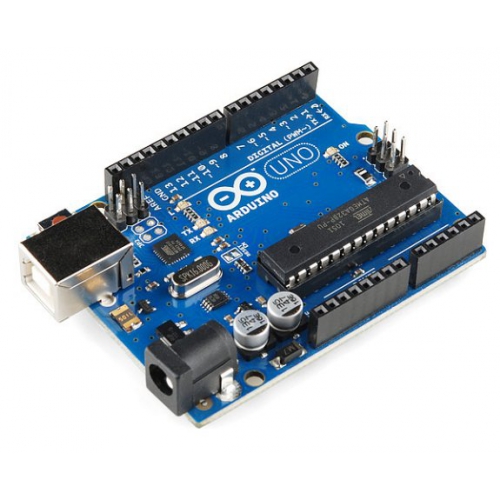
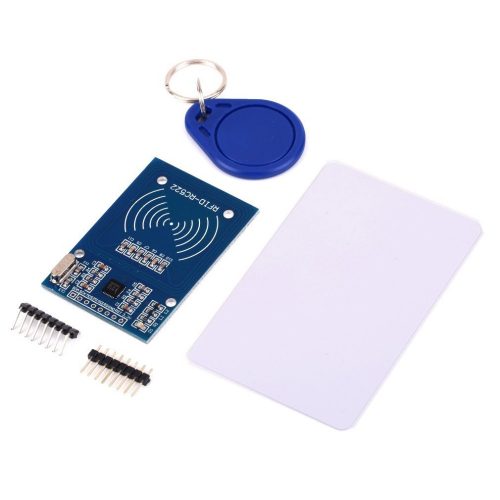
- Arduino and NFC module. They also come in an awesome kit
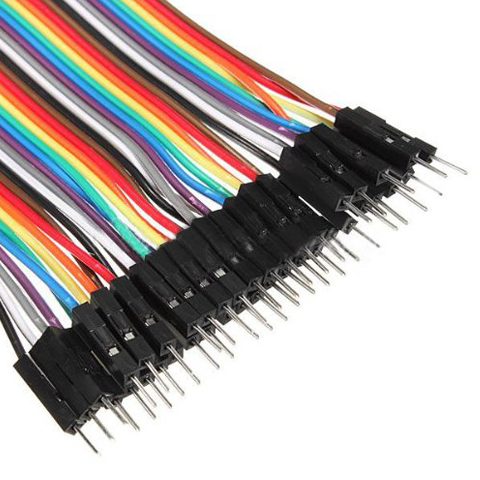
- Some wires to connect Arduino with the NFC module
- Blank NTAG215 NFC tags — one per amiibo figurine
- My Arduino sketches for amiibo management
- Arduino library for the NFC shield
- Amiibo dump in bin format
- Encryption/decryption key for the dump editing
Getting the NFC tag UID
First let’s find all the required info on the NFC tag which we want to write the amiibo dump into.
Use the Dumpinfo sketch which comes with the NFC shield library in order to get the NFC tag UID.
Run the sketch and put the card on the reader:
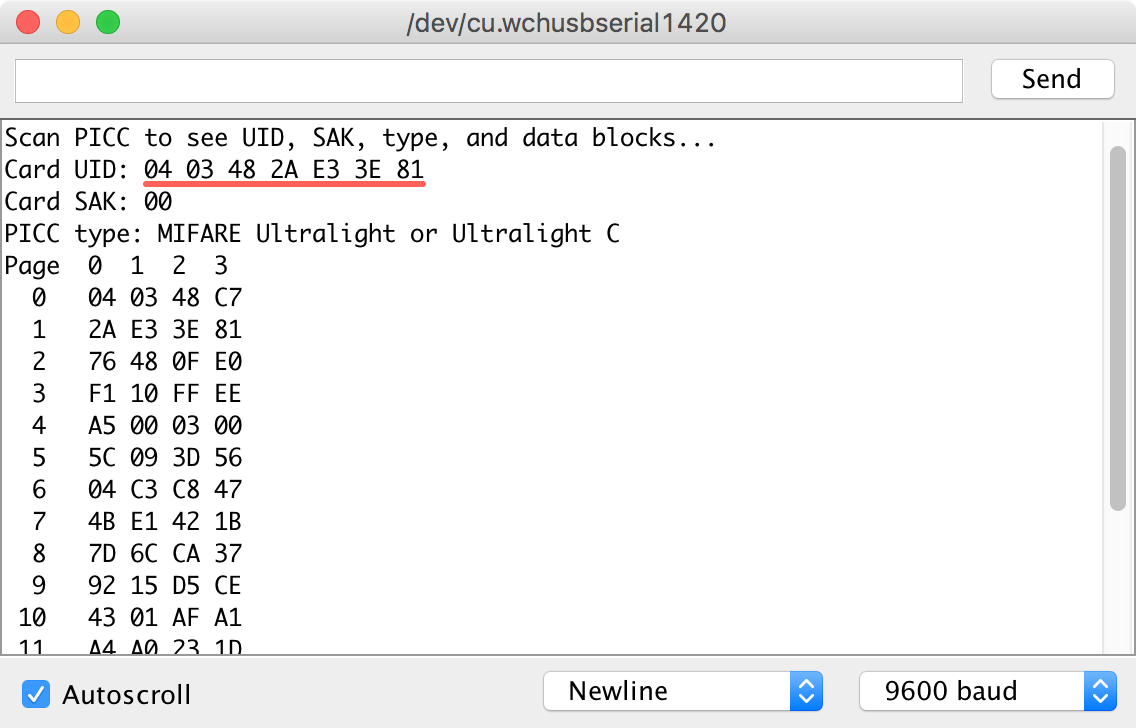
In my case, the UID is: 0403482AE33E81
Getting the amiibo dump
Now it is required to dump the amiibo figurine that we have. Dumps from the Internet are suitable too. Usually you can find them by googling “Amiibo BINs”.
I made an Arduino sketch to make amiibo dumps which is called Dump_amiibo
. It’s enough to upload it into Arduino and put the figurine on the reader. In a few seconds the dump will appear on the screen. Just copy it into a hex-editor and save the resulting file. In this example I called mine as Chibi-Robo.dump.bin
.
Decoding, editing, and encoding the dump
Now prepare the dump to be written to the tag.
Go to https://games.kel.mn/amiibo, pick your dump, the key then specify the UID of the blank tag. Press “Submit”.
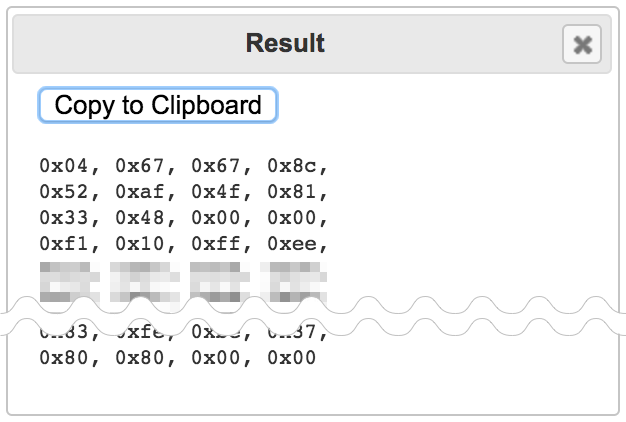
On the next page you will get the code of the dump made specifically for your tag.
Writing the dump into the NFC tag
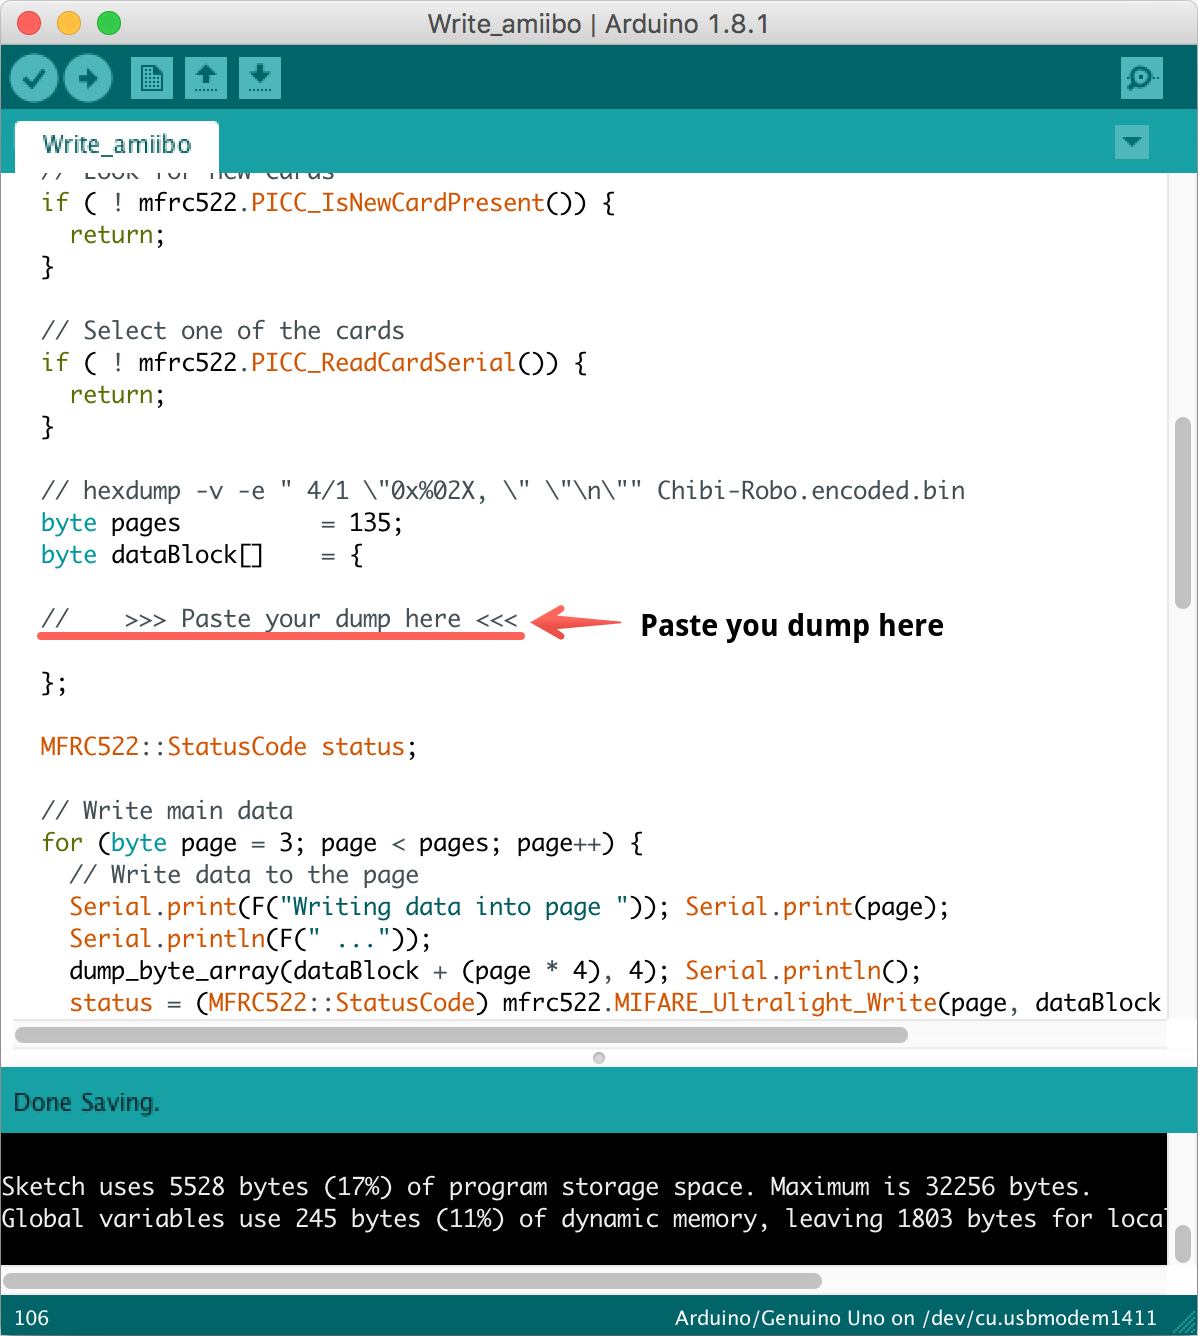
Now this code should be pasted into the Write_amiibo
Arduino sketch.
Copy the results into the sketch:
Run the sketch, put the tag, wait till the writing process is finished.
After you see the “Write finished! Now please take your Amiibo card away!” message it is safe to take the tag away.
Results
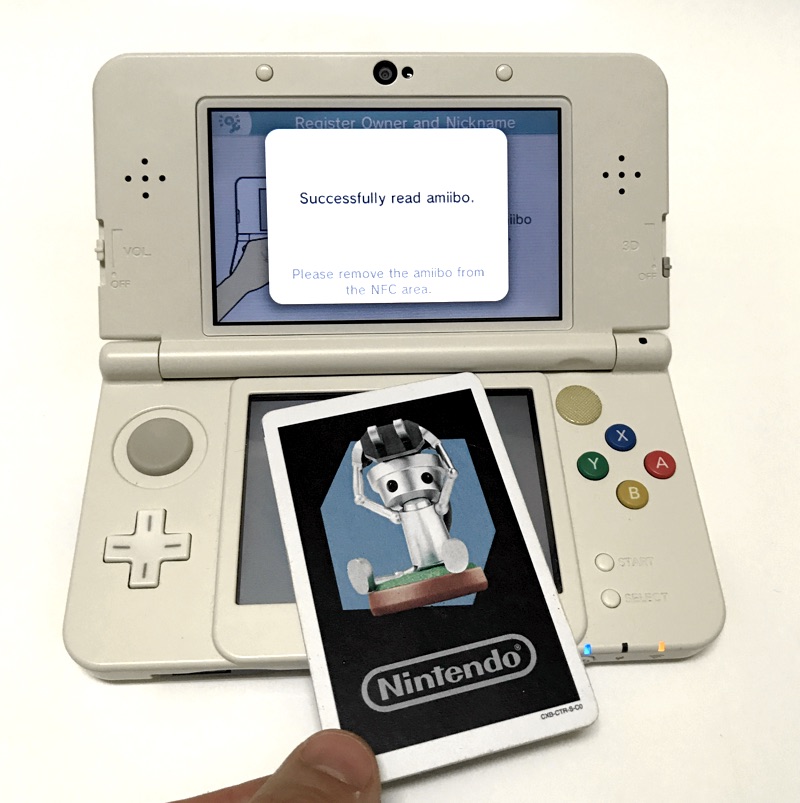
If all the steps were performed correctly then your amiibo clone is ready!
Buying Guide
Ultimate Arduino Bundle
Comes with all the required devices plus a lot of extras for your future projects!Sources:
Making Amiibo NTAG215s — GBATemp.net
NTAG213/215/216 datasheet
bkifft’s amiiscript.sh

[…] Create amiibo clones with Arduino Worth a read […]
[…] work again, and I'm able to upload Blink from the Arduino examples, but when I try to follow this guide , the serial out is giving […]
Привет Костя.
Какой код что бы показывать какую-то инфо на LCD 16×2 ?
Задание спасибо
Привет, Стас! Простейший пример использования ты можешь посмотреть здесь: https://www.arduino.cc/en/Tutorial/HelloWorld
Обрати внимание, что в примере некоторые контакты для подключения экрана пересекаются с контактами для подключения NFC-модуля, поэтому можно попробовать заменить контакты 11, 12 из примера, на любые другие свободные, например 6 и 7.
К сожалению, у меня нет под рукой подходящего экрана, чтобы это проверить, но не вижу причин, почему это не должно заработать.
Пиши, если у тебя появятся другие вопросы.
Кстати, у моей инструкции есть версия на русском здесь: https://games.kel.mn/ru/sozdanie-kopij-amiibo-s-pomoshhyu-arduino/
I followed what to do put the dump on a nfc tag (https://www.amazon.co.uk/gp/product/B0725XF5DT/ref=ppx_yo_dt_b_asin_title_o00_s00?ie=UTF8&psc=1) and my switch says that it is not a amiibo 🙁
Hi Lewis, I’m sorry to hear that you’re having troubles with your cloned amiibos.
I followed the link and checked the description of the tags you’ve bought and they look perfectly fine.
Make sure you follow the article correctly and do all the steps. Remember that you need to repeat the process from the beginning with each new tag you’re going to turn into amiibo, don’t forget to get the UID of the new tag and put in into the form.
On your “https://games.kel.mn/amiibo/” im getting an error saying my key is too large. Im trying to upload the splatoon inkling squid from NFC Bank (the spaltoon 2 set) with this retail key ”
[removed]
”
and im getting the error my key is too big. why would that be?
Hi Alex, the file size of the key has to be 160 bytes. Make sure you’ve saved it as a binary, not as a text file.
It also seems like you only have the second half of the key.
How long should the hex be in char’s? spaced i have (23 30 30…) 1436 characters. not spaced (233030…) i have 959 characters. This is after i convert them. Im using the first file on the google search of the link you provided, the 4 lined one on pastebin. I have done this before and cannot find my old retail key so i have to make a new one. Thank you for all your help tho 🙂
It is 320 chars with no spaces. Sorry for the hassle, unfortunately, I am now allowed to provide a direct link to the key.
OK so I couldn’t figure it out (again) but I did find my old reg-key that works.
Good for you! Happy cloning!
Hello,
I was able to run your scripts to dump one of my Amiibos successfully. But when I try to run the DumpInfo on a blank NFC card, nothing happens.
These are the cards I have
https://www.aliexpress.com/item/100pcs-NTAG215-NFC-Forum-Type-2-Tag-for-All-NFC-Mobile-Phone-NFC-Card/32258165667.html
I used them a few months ago with TagMo and an Android phone successfully. Now trying with a chinese Uno and NFC module (same as your above). But once I see the prompt in the console, and I place one blank card, nothing happens..; I tried moving the cable from Pin 9 to 5 , nothing changes… I’m at a loss now 🙁
Reading amiibos is fine even with Amiibombuino. But write also does nothing its like it does not see the card…
First, I advise you to stick a small coin to the center of the antenna of the NFC-module, it should increase the antenna’s power. If this does not help, buy the PN532 module and follow this guide: https://games.kel.mn/en/create-amiibo-clones-with-arduino-and-pn532-nfc-module/
Unfortunately, some Chinese tags do not work with cheap RC522 modules and no one was able to fix it yet. I personally have about a hundred of such problematic tags. I write them without issues with PN532 module and the 3DS itself.
Hi Kostia,
I’m getting that same nak error.. i did order ntag215s from aliexpress
http://s.aliexpress.com/URZnqiei , I have tried a few cards…
what am I doing wrong?
Hi, the NAK error usually appears when you’re trying to write to an already used tag for the second time. I recommend you to get another tag and to start from the beginning.
There are also a couple of tools which simplify the process, such as AmiiBomb and AmiiDuino. Try them too.
[…] create-amiibo-clones-with-arduino […]
[…] escribir estas etiquetas NFC. Me llamo mucho la atención una entrada del blog de un chico llamado Kostia, donde explicaba como clonar Amiibos con Arduino, como ya tenía algo de experiencia con esta placa […]
Hey thank you so much for all of this, I have managed to write to tags successfully however when I try to use them it BOTW they do not work it just makes a ‘beep’ sound. I was wondering if you knew how to fix this issue?
Hi Alex, as we found out, it was the wrong UID that was used during the process.
Hey Suki,
I am going to attempt to write a sketch for the Adafruit PN532 shield on an Arduino Uno (using Adafruit’s libraries and an I2C connection). I am new to coding and Arduino… I noticed in the comment you left wherein you were guiding another person attempting to do the same thing that you said it’s very important to incorporate error checking into the sketch… but check for success of what exactly?
this step: “Use this to Encrypt your custom Amiibo NTag pastebin” isn’t good enough.
link the actual site…
I keep getting this error : A MIFARE PICC responded with NAK. What am I doing wrong?
Hi Dan!
Seems like you’re trying to write to a password protected tag. Usually that happens when you try to write a dump onto the same tag for the second time.
Try to generate a new dump and write it on another tag.
I have tried multiple tags and it still isnt working. the first time I run it it gets to page 45 then gives that error message. The following times it only goes to 18. I have done this on at least 5 tags and it still doesnt work.
Hmm. Sounds strange. Can you make dumps of your failed tags using the Dump_amiibo sketch and submit them via the feedback form?
Just sent the dump. Let me know what you find out. And thanks for the help!
Hi, I checked the dump you sent me.
Seems like you’ve got the wrong tags.
According to the dump, yours tag has only 45 pages of memory, which means you’ve got NTAG213 tags.
But for this article you need NTAG215 tags, that have enough memory to hold the dump data.
I would recommend you to buy the suitable tags and try again.
That online tool is fantastic! I’ve been rolling my own arduino code with the Seeed NFC Shield 2.1, and your tool is helping me smooth out that process as well.
Thank you for your feedback! I have surely put some love into the online tool to make it simple and friendly to use!
Thanks for putting all this together. I bought both the NFC module and cards from your Ali links above, so I think I have all the right equipment. I flashed DumpInfo onto the arduino and I can read the info of the two sample cards (both are “PICC type: MIFARE 1KB”, these only have a 4-byte UID so I’m assuming these won’t work) but none of the NTAG215 tags that I bought are showing info. Any thoughts about what I might be doing wrong? Is it possible that I got a dud batch of 20?
FYI I read on the MFRC522 library page: “Some boards bought from chinese manufactures do not use the best components and this can affect the detection of different types of tag/card. In some of these boards, the L1 and L2 inductors do not have a high enough current so the signal generated is not enough to get Ultralight C and NTAG203 tags to work, replacing those with same inductance (2.2uH) but higher operating current inductors should make things work smoothly. Also, in some of those boards the harmonic and matching circuit needs to be tuned, for this replace C4 and C5 with 33pf capacitors and you are all set. (Source: Mikro Elektronika)” So I’ve ordered replacement parts for L1 and L2 and will see if that resolves it.
Hi! Unfortunately, some readers have weaker antennas.
I have one weak reader and I was able to fix it with just a coin.
Put a small coin in the middle of your NFC module’s antenna this way: http://imgur.com/a/MQvez
Make sure the coin don’t touch any exposed metal contacts on the board.
If this works, stick the coin to the reader. I used hot glue but you can use anything you like, even a gum.
The effect varies depending on a coin size. I started with largest coin and then gradually decreased the size. I found that the signal is equally good both with 5 and 2 euro cents but isn’t good enough with 1 cent.
Hope this helps!
That absolutely did the trick. A US quarter worked best for reading and writing. Thanks Kostia!
I’m glad this helped! Can you please share a picture of the result?
Sure, here it is: https://imgur.com/1HbYB3W
Hey, thanks for the photo! Nice job!
Do you know of another trick for getting the 7-byte UID instead of a 4-byte that doesn’t involve putting coins on the antenna (I’ve tried every coin in brazilian monetary system) or replacing SMDs that the delivery cost would be a fifty times their value? Waiting for help =D
Seems like you’ve got wrong NFC tags. Are you using ones that came with the NFC module? Check that you’re using NTAG215 tags first. No coin can solve this issue.
I am using the tags that came with the reader (both the card and the key chain read 4 -byte UIDs).How can I know the type of tag I’m using?
The type is displayed by the DumpInfo sketch. For your tags it will say “PICC TYPE: MIFARE 1KB”, the NTAG215 tag will be recognized as “MIFARE Ultralight or Ultralight C” as seen on the screenshots for this article.
Humm, I see. I will try buying new cards of the right type and try again. Thanks for the attention and fast responses. =D
you changed the article… now it doesn’t match up with what you had before… I kept getting the wrong tags (aliexpress kept sending me 216 and 213 and not 215… and now that I finally get them, the article changed… your instructions on how to use the online dump editing tool aren’t as clear as your previous article was… My understanding to the dump is the amiibo dump that I’m trying to copy to the tag is that correct? if so then the key dump what is that? where do I get that bin?
I did do a google search for that particular file… I put the dump file into the right place, the key on the right place, and I put the 7 byte UID without spaces and press submit… I burn the tag and try to read it and it says this is not an amiibo… I would greatly appreciate your help, since I only got 9 more of these…. I’m assuming you can’t re-write them?
Hi, @disqus_fKIH4XBZMA:disqus
So you’ve figured out how to use the online tool?
Sorry for the article change, I’m trying to keep as simple as possible, and the online tool simplifies the process a lot.
Let me explain the process to you. In order to make an amiibo clone you should do the following:
1. Take a clear tag, scan it with DumpInfo sketch.
2. Take the UID from the output, it should look like 04010203040581.
3. Go to https://games.kel.mn/amiibo enter the UID you got, upload the amiibo dump and the key.
4. You will get the new UID-specific dump which can be now written to your blank tag.
5. Paste that dump into the Write_amiibo sketch, upload it to your Arduino, write the tag.
In case you still have troubles with your tags, try the Amiibomb tool: https://github.com/AcK77/AmiiBomb-uino/releases/
The most up to date information on it available here: https://gbatemp.net/threads/tools-amiibomb.467990/
Thanks for the reply! the UID is that the one right after the title card UID? or the one in the array below? because on your new article you underline your UID but state a different UID. I’m guessing by the way you’re posting your UID in this response, it doesn’t need the spaces. Thanks a lot again for your reply!
Thanks for the notice, I fixed the UID in the article to match the screenshot.
The online tool accepts the UID with spaces too, so no need to remove them.
Just use the UID of your tag, not the one in the article 🙂
Where do I get the key file?
Google “Use this to Encrypt your custom Amiibo NTag pastebin” and you will find it easily.
All I found was a long string of symbols that I don’t know what to do with.
You should copy those strings and paste them into the hex editor one after another.
But if you’re not that comfortable with hex-editors, try to google “amiibo key_retail.bin” instead 🙂
Okay thanks. Will try. Btw I just supported you on patreon with the 5$ subscription. I hope that it helps 😀
Like this? https://uploads.disquscdn.com/images/e1e59c89eb129211e9d4d8c79881c3ecc2267350f886e0ec90ed0edcc332eb0e.png
Right!
Doesn’t work 😀
https://uploads.disquscdn.com/images/549e7d52e7ebe575581716108d8e84098dfa2e68f8c1edfbf37574539b970f0e.png
I just realised that you’ve pasted the text into the text editor, not a hex editor. This wouldn’t work!
Oh. Me is stoopid 😀 What HEX editor do you recommend?
I had one on my pc 😀
Now this looks correct 🙂
It works 😀 If I run into any problems I will contact you again.
Glad this worked!
May I ask you to remove images from your posts?
Will do
Starting up BoTW. Let’s see if this works
Let me know the results!
Game doesn’t accept the amiibo. Is it supposed to be grey like this? https://uploads.disquscdn.com/images/d51ea0710996755bfef4fa7abc1d79d6408fe09e2d5b145122a0094bca3ebca9.png
No, it isn’t.
I’m afraid that you just wasted a tag 🙁
Try to take another tag. Don’t forget to make a new dump for it.
You can also try Amiibomb, a tool which makes the whole process a lot easier: https://github.com/AcK77/AmiiBomb-uino/releases/
So what do I do with it? I know about the program but I just want to try to make it work this way too. And dont worry about the tag. I got 200 of them for 30$…and they work
Oh, great then!
Just take a new tag, generate the dump, paste it into the sketch, upload to Arduino, write the tag.
Make sure you don’t leave any dump lines commented this time.
Also please remember to repeat the process from the beginning for each new tag.
Oh and how do I write the amiibos using the software?
You mean Amiibomb?
I haven’t tried it yet, but the process is pretty simple.
Just plug in the Arduino with NFC module connected, run the tool, specify the key file, the folder with amiibo dumps, choose the one you want to write, put the tag to the reader, done!
It wont write it.
That’s strange! You can let the developer know about your experience in his thread on GRATemp: https://gbatemp.net/threads/tools-amiibomb.467990/
Okay the latest version works 😀 My little bro is happy, that’s all that matters 😀
Great! Congratulations and happy cloning then! 🙂
And may I ask why didn’t you just gave us the key file?
The key is leaked and belongs to Nintendo, so it is illegal to share it and I can only provide hints on how to find it but not give direct links.
Oh ok
Thanks!
Hey, thank you for your support! It means a lot to me!
All I found was a long string of symbols which I dont know what to do with.
I am very new to arduino. Where do I see the UID?
Okeh….I’m just really stupid and I ran the wrong sketch…oops
I’m wondering if you have any hints for setting up the rc522 with arduino itself. I followed a guide on a gbatemp forum and the end result is that the nfc id finding process spits out “Firmware Version: 0x0 = (unknown)
WARNING: Communication failure, is the MFRC522 properly connected?”
You skip over the whole section of setting up the board, what pin to what pin, even little things like where to open the output serial monitor window took a bit of google. first time with arduino solely for this and I’m not feeling good about this.
this is the basic setup i have, except my rc522 came with the 8pins header pre-soldered.
http://www.mschoeffler.de/wp-content/uploads/2017/02/rfid-rc522_bb.png
redid the wiring just incase, now im seeing Firmware Version: 0xFF = (unknown)
WARNING: Communication failure, is the MFRC522 properly connected?
Scan PICC to see UID, SAK, type, and data blocks…
apparently the rc522 I got is SPI only, no I2C bus support compared to others. I’m not sure if thats a problem.
Hi, can you show a photo of your module or give a link to its description?
It’s made by sunfounder, I don’t have a direct link on hand. Found a Nexus 7 refurbished for 60-ish so im just going to try tagmo next.
All the SunFounder modules I was able to found are based on PN532 chip, not RC532, probably that’s why it wasn’t working properly.
Glad you found an android smartphone, this way it would be much simpler indeed.
Here’s an image, it’s def an rc 522, for some reason discus on Android Firefox doesn’t support hold to bring up copy cut paste menu. https://uploads.disquscdn.com/images/0f7a07451b9a3c102c06628a762deb73bb711e13519aa061f4949fd7ab335769.jpg
Yeah, this one looks like RC522 module. Great that you’ve figured out how to connect it properly!
I had almost the same experience with the PN532 module, when I was ready to ask for refund before realising that I messed up with the connections.
And thank you for becoming my patron! I appreciate it a lot!
so i gave the dumpinfo scketch a try and i don’t get what you have in the picture. when i open the serial monitor it’s just a line of questionmarks and gibberish. do i have a bad reader?
Try to change the baud rate to 9600 baud, see the dropdown list in the bottom part of the serial monitor window.
thank you. that did the trick.
Thanks for the great tutorial!
I’m stuck on the dump info.
I don’t get a part that says the UID of the card.
Mine looks like this:
Firmware Version: 0x92 = v2.0
Arduino amiibo reader. Put your NFC-tag to the reader
04DDA1F0
AA064F80
63480000
E1103E00
0300FE00
00000000
00000000
00000000
00000000
Any ideas ?
Seems like you’re running the wrong sketch!
Go to
File → Examples → MFRC522 → DumpInfo
and upload that sketch to your Arduino.
Wow. This works! I can’t even follow directions properly. Lol.
Thanks for the quick reply!
Sure, no problem, that’s what comment section is for 🙂
2 more questions if I may..
In the online tool, what file goes in the Key section. I am using downloaded dumps, and I do not see any Key.bin files.
Also, when you say to “Paste the dump” into the write sketch, what exactly goes there? A path to the encrypted file? The actual text? How would I get that?
Ok, that was more than two questions.
1. The key file is usually called key_retail.bin and can be easily found by googling “Use this to Encrypt your custom Amiibo NTag pastebin”
2. Paste the text from the online tool output. It can be easily copied to the clipboard with the “Copy to Clipboard” button 🙂
Got it. I think that worked. Ill know when I try it tonight. Thanks again for making this guide and supporting it!
Let me know the results! Good luck and happy cloning!
Hey, was just curious if you are still working on the PN532? If not I was thinking of just picking up the components you used anyway to try this out soon. Thanks for sharing this!
Hi, @disqus_wrWU9E3bxZ:disqus!
Yes, I’m working on it! I also post frequent progress updates on my Patreon page 😉
Hi @Kostia! If I donate to you now will I still get the sketches earlier? Thanks!
Hi @Muchieman,
sure, why not!
Let me know when the sketches are done and I’ll donate 🙂
You still working on it?
Hi, sketches are ready but I need the blank tags to arrive in order to test everything. Probably I can provide the sketches earlier to the donators for beta test. What do you think?
That would be awesome! It would be the fastest way for me to get going on this. I just figured out how to use amiibomb, but I’m not sure if I can use it with the Adafruit Metro.
Thanks for your advice, the donators have just got their access to the closed beta test!
You can get the access too either with a PayPal donation or by becoming my patron on Patreon (the $5 tier).
As far as I know, amiibomb has no PN532 module support yet, so it will not work no matter what Arduino model you use.
I don’t how I missed this, but it’s in the “What’s next” section on the GBATemp thread. It says “Support PN532 NFC Module in AmiiBombuino”. I will probably donate when I get home 🙂
I’ve got a problem much earlier on in the process. Namely, I can’t figure out how to install amiitool to begin with.
I’m new to Linux but familiar with the command line from OS X and have read enough about it on Linux to make my way around. https://uploads.disquscdn.com/images/f81970dd6efec23d51e7f23b1cc4ff3a3318543b21fb44f0496bd81e64dc33b0.png
Hi @dennis_alaniz:disqus! Seems like you’re trying to build amiitool from source.
If you really want to do that, you need to download mbedtls code first by running:
git clone https://github.com/ARMmbed/mbedtls.git
This error message should be gone then.
Otherwise just use the pre-built binary.
Thank you. Very helpful (and kind of embarrassing). I’d tried downloading that earlier, was unable to get the download to work, so found it on Git and tried to do it myself thinking it was the same file.
It took me a while to get Mega to let me successfully download it, but all is well now.
dennis
I’ve got virtual box and Ubuntu up and running on my mac, but I’m clueless in Linux and can’t get Amiitool up and running.
It’s downloaded to the linux box, unarchived to my user folder and I’ve used cd to get terminal into the right folder, but I don’t know what to do from here. Does it need to be installed? If so, how?
thanks!
dennis
This is 100% what I was looking for! But I don’t understand why amiitool is only for linux? Do i have to get linux to use it? I’m stuck at that part right now.
Hi, @muchieman:disqus!
There is actually a Windows version of amiitool released recently: https://github.com/socram8888/amiitool/releases
And as far as I can tell it works exactly as Linux version, so you may try it!
Ok thanks. I am on a mac but I have windows in bootcamp. It looks like your using a mac though? Or is that after you
used amiitool?
Yes, I use amiitool on Linux and then edit dumps on Mac. There is no amiitool for Mac, unfortunately.
also because you’re one of the only people I can find that knows about this stuff, if I don’t have an amiibo is it still possible to do this? with an amiibo file from the internet?
This is also possible but it may be not legal if you don’t own the amiibo you’re downloading the dump of.
@Kostia ok… I am trying to use amiitool and when I go into the folder where amiitool is along with the .bin file and run ./amiitool -k key_retail.bin -e -i “Chibi-Robo.decoded.bin” -o “Chibi-Robo.encoded.bin” I just get amiitool: command not found
You should first make the amiitool executable by running
chmod +x amiitool
in the same folder where you placed the amiitool to.
Also make sure that you have the key_retail.bin and the dump in the same directory.
Ok still trying to figure this out. I am trying to use the Write_amiibo tool and I pasted it all in and then I realized that you have a pn522. I have a pn532. How do I make this work with the pn532?
Sorry, I don’t own a PN532 board and can’t write for it.
But there were some people in the comments who managed to adapt the sketch to work with the module.
If you like you can make a donation here, so I can buy the module and make a sketch for it.
I totally would but I’m 16 and I have no money.
Sure, no problem. Then I would recommend you do dive into coding and maybe get in touch with people in the comment section who managed to make the code work with your NFC module.
Of course you can also buy a suitable module and get to the cloning immediately.
I looked quickly in the comments to see if anyone actually got it working, and it doesn’t look like anyone did? I was going to ask for the code but it doesn’t look like anyone actually did it. Also I would prefer not to buy it from there mostly because I like to support the local place where I live. And I don’t have to wait for shipping this way.
And if you can please look at the adafruit examples for this board. It shows you how it works and stuff, but I didn’t quite understand it. I understand your sketches work though.
examples are here: https://learn.adafruit.com/adafruit-pn532-rfid-nfc/arduino-library
I checked the comments section once again and must admit that the only person who actually tried to code for PN532 was Suki, but later that person switched to the RC522 module which I use in the article.
So you should figure out on your own how to code for that board.
As I mentioned before I don’t have the board and can’t code for it. But as it seems the library comes with a lot of useful examples which you can use. There is also an Arduino forum where you can ask for help: http://forum.arduino.cc/
Hi Kostia,
I’ve given him an example and mentioned to refer to the examples available through the libraries and arduino. I did get it “working”, but haven’t re-implemented some of the error checks, but it’s also readily available through adafruit libraries and examples (the code actually becomes “simpler”). And you are correct, currently I’m using the rc522 module in the meantime just out of convenience. Ie. both boards work.
Hi Mucieman,
Kostia is correct in that I did try to code for PN532. And it does “work”. You should install the adafruit-pn532 libraries as they have a direct write to ntag215s command (but you can write the function yourself by destructing their code.). Here’s an example sketch:
NOTE: IT DOES NOT INCLUDE ERROR CHECKING, you SHOULD implement it (check for success’ – the library should have the functions for it).
NOTE: you must go into the .cpp of the adafruit library and under the function “nfc.ntag2xx_WritePage” you need to remove the < 4 page check, VERY IMPORTANT.
int shift = 0;
byte data[] = {0, 0, 0, 0};
byte pages = 135;
byte dataBlock[] { … amiibo dump…};
// Write main data – the function takes 4 bytes at a time
for (byte page = 3; page < pages; page++) {
// Write data to the page
if(page != 130)
{
for (byte i = 0; i < 4; i++)
{
data[i] = dataBlock[shift + i];
}
nfc.ntag2xx_WritePage(page, data);
}
shift = shift + 4;
}
// Write lock bytes – the last thing you should do.
// If you write them too early – your tag is wasted.
// Write the Dynamic Lock Bytes
byte DynamicLockBlock[] = {
0x01, 0x00, 0x0F, 0xBD
};
nfc.ntag2xx_WritePage(130, DynamicLockBlock);
// Now we can write Static Lock Bytes – first 4 bytes
byte StaticLockBlock[] = {
0x0F, 0xE0, 0x0F, 0xE0
};
nfc.ntag2xx_WritePage(2, StaticLockBlock);
If you hooked it up directly to an uno as a shield, I assumed you didn't use the SPI breakout. So define your IRQ and RESET pins and initialize via IRQ/RESET, ignore SPI lines.
#define PN532_IRQ (2)
#define PN532_RESET (3) // Not connected by default on the NFC Shield
Adafruit_PN532 nfc(PN532_IRQ, PN532_RESET);
Also refer to the adafruit examples as Kostia has referenced in the comments. everything I said can be constructed through their examples and some basic arduino programming :).
Ok thats cool. I’m using the breakout though
This is great! You are the best!
Better than that, maybe if we could use the n3DS (or maybe a skylanders “portal” on pc?) to write the tags.
But this is very good, I may invest on that for being very practic
Hi Kostia, Thank you for your tutorial, seems very informing. I’m trying to have this working, seems like I’m writing to the tags just fine, but they aren’t reading, and I’m assuming its on the data level. And I’m wondering if it has to do with the status locking bytes. In your sketch you have the first 2 bytes the same as the second 2 bytes. I’ve read else where that byte 0 1 2 3 should be BCC1 0x48 0x0F, 0xE0. Anytime I re-read my written ntag215, the mid portion of the data loooooks correct? but its after page 130 its different.
For the UID password, I use that online tool you posted, and for encryption/decryption I use the online tool as well and edit directly online. For read/write, I’m using a PN532 shield with adafruit-pn532 libraries. It appears that I’m writing to the tag just fine, as I can familarize the dataset on the first few pages , and on page 130 with the last byte being 0xBD
Using the nintendo switch console.
Hi Suki!
First, thank you for the feedback!
Second, please refrain from using the online tool. Seems like it generates slightly different dumps from what Linux amiitool does and that could be the reason why your tags don’t work.
Third, yes, you’re right, in my sketch I write “0x0F, 0xE0, 0x0F, 0xE0” instead of “something, something, 0x0F, 0xE0”, but that two “something, something” bytes are non-writable, so it doesn’t matter what you’re writing there, they will stay the same.
Fourth, what exactly looks different after page 130? If that’s the password and response bytes — that’s totally normal. You may check the datasheet to understand why that is happening.
Hey Kostia,
Thanks for the quick reply! Yeah I started digging into it, and I will try to give the linux tool a try instead in the coming days (just need to get a VM setup). And thanks for the clarification :). I’ll give it another whirl and keep you posted.
Cheers!
Just a quick update. I haven’t tried the linux amiitool yet, but I did try to rule out as many factors as possible so I went out and got me the exact same reader as the one in this tutorial and using the exact same libaries and sketches. I can confirm that the read/write appears to be working just fine, so it does seem to narrow down to the online amiitool. Will now move onto the linux amiitool soon and try that.
Hi Kostia,
Last update haha. So it worked! I officially confirm that it was the online amiitool that was not giving correct dumps. So I would recommend as you did, that everyone avoids that online tool and follow your guide exactly as is. Thanks again! and great guide!
Great, glad this worked for you!
Thanks for update and happy cloning!
Hi, Does anyone have a guide on how to setup the Arduino and card reader?
Just a short question I see that most dumps you can find are 540 bytes big. The NTAG215 chips that I can buy szate they have 540 bytes in total but writeable it is only lile 504 sometimes 480 depending on the vendors description. So as I am a little bit confused I just wanted to ask can I use those 540Tags? Or are there NTAG215 chips with more capacity?
Best Regards
Miles
All NTAG215 tags are the same. Sure, you can’t change all the 540 bytes they hold (some of them hold the important data, such as serial number etc., which can not be changed), that’s why some sellers may specify a smaller size in their listings.
I recommend these tags because they are more durable, have a larger antenna and can also be customized with nice stickers!
Thank you for your quick reply 🙂
https://imgur.com/a/HlNB2 this is my NFC reader
I also have the same reader and it is a pretty strong one. You still may want to try a trick with the coin though.
the coin trick works great! now I have more stable readings! it’s awsome! XD
Now the reader is more stable if not always perfect, only question that remains is when decoding and encoding, I use amiitool for windows, I managed to write a couple of tags, but do not work on WiiU
I am pretty sure the amiitool for Windows is fine, just make sure that you follow the guide correctly.
If in doubt, you may also try the online amiibo encoding-decoding and editing tool: http://amiibo.vgmoz.com/hex
After you upload the dump you’ll see the hex editor with the blue indicator in the bottom right corner displaying the offset in dec format. Here are the offsets you have to edit:
0 for last UID byte
2–3 to replace with 0000
468–475 for first eight UID bytes
520–522 to replace with 000000
523–535 for password
536–537 to replace with 8080
If you click the blue offset indicator it will show you the values in hex which is somewhat easier to use, so here is the same list but with hex values instead of dec ones:
00 for last UID byte
02–03 to replace with 0000
1D4–1DB for first eight UID bytes
208–20A to replace with 000000
214–217 for password
218–219 to replace with 8080
excellent tool! then load the dump, I modify the offset, and i download the encrypted version? i download files dump but I don’t have the UID, i must use the first 7 bytes of the dump without regard to offest 4 dec?
Sorry, I don’t get the point.
This is how you would use this tool:
1. Upload your dump.
2. It gets automatically decrypted and displayed on the page.
3. Edit the corresponding bytes.
4. Hit the “Download Encrypted” button and download the dump designed specifically for your tag.
5. Write this dump to your tag.
You said “I don’t have the UID”, what did you mean by that?
http://games.kel.mn/wp-content/uploads/2017/01/arduino-uid-en.png,
I read the uid only when I make the dump, not with the downloaded version (only bin), otherwise use the first 8 bytes by deleting the fourth?
Check the instructions again. You should read your blank tag in order to get its UID. Then you generate the password from that UID and paste both into the decrypted dump.
OK I thought that you had to take it from the original UID tags not from empty tags.
I tried two other empty tags, but I still can not get it going, now I can always write, but does not work on WiiU, if I sent the uid of my empty tag, you create me the code to put on the sketch? so I can compare it with what I create
Sorry, can’t do that. Follow the instructions, then share the UID of the blank tag and first 16 and last 20 bytes of the resulting dump. I will tell you if that looks fine.
https://pastebin.com/BED7PBW1 help me XD
https://mega.nz/#!JY0AnDhB!9OOo1KITKXI_JP8–jT9lynqR-xWB6RMWIJh2SRL010 this is the original bin
Hi Dan! Your dump looks absolutely fine!
But it does not work, sure it’s not necessary key_retail.bin?
It is not related to the key, otherwise you wouldn’t be able to decode/encode the dump at all.
Are you sure you have written the dump to the blank tag with UID 04 7A C7 5A 06 4F 81?
Can you dump the resulting tag and show it to me?
Can you also share the sketch you used?
https://pastebin.com/gSaBy14R this the sketch
https://pastebin.com/ZKZtr7vF this is the dump
Everything looks fine. How does your Wii U react to the tags? Are you trying to use them in the game or in the special amiibo settings menu?
Can you make a screenshot?
the amiibo I tried to clone is link smash bros series, i have the original amiibo, but i don’t want open it XD https://imgur.com/a/sOiXy
https://imgur.com/a/TNGA6 this is mario kart and they says: “Unable to read data from the amiibo”
https://imgur.com/a/EnmTI this is mario kart with falco’s amiibo and they read it
https://imgur.com/a/KzJUf this is smash bros and they say: “this amiibo is not compatible with smash bros”
Try to go to the Wii U amiibo settings and scan/register your tags there: http://en-americas-support.nintendo.com/app/answers/detail/a_id/13177/~/how-to-register-an-amiibo-and-give-it-a-nickname
Let me know the results.
i tried but the game always say: “this amiibo is not compatible with smash bros” 🙁
i must buy others tag? other brand?
I mean try to scan the tag in the system settings, not in game.
Also if you don’t have success with these tags you may want to try these cards.
They have larger antennas and are better recognized by console and the reader. They are also more durable and you can customize them!
If ten cards in not enough (you will run out of them pretty quickly, trust me), you can also get 20, 50 or even 100 of them!
in setting menu of the amiibo say: error code 169-0413 this amiibo is not valid…
I think that maybe there is an issue with the Windows version of the amiitool.
Try the Linux version. No need to install Linux on your PC. I personally run a Linux VM on my mac with VirtualBox and Vagrant.
As an alternative you may also try the online tool I mentioned earlier.
Good luck!
at the moment i used the online tool that you told me, first i retry the amiibo windows tool?
The order is not important. You may try the following order: online tool, then amiitool for Windows, then amiitool for Linux.
Hi Dan, just wanted to let you know that it seems like the online tool has some issues and the Linux version of amiitool works best.
523–535 for password
Here there is an error,
532–535 for password
so it is the right hand,
right?
Nice catch! Will edit my comment to avoid further confusion.
https://uploads.disquscdn.com/images/a875c17620eb94a66d57d379a3d05f1269686ede37e310426a423000cf4496c9.png https://uploads.disquscdn.com/images/4e1e5ca59b950788c4c14522b1a884e4b3831f0ca6ee7f59ee467484087c1424.png https://uploads.disquscdn.com/images/1e80a47057d52da6d22845bfc7e1c1b3151ef214e722b6bc9d8c0fdba235ff6e.png https://uploads.disquscdn.com/images/d0365755b8b7e593dddd81efa21d471c5060cec35541f5842d253ab2c96d4ec4.png I keep getting error “This is not an amiibo”
https://uploads.disquscdn.com/images/3ace131147e1d781cafe217d8a2af460e045a45a564052b1027a46bf9509c053.png
Hi, what’s on the second image? What tag have you scanned?
I redid one and got the same result. I wrote up the steps I took.
I may not understand you correctly. Please add descriptions to your screenshots.
Here is the process that I am following:
I did the DumpInfo to get the UID
https://uploads.disquscdn.com/images/b66356f09b784605d685a18d62c1d215abdce273d2a53676cacd310e2a89ad83.png
Short UID: 04442CF2484D80
Long UID: 04442CE4F2484D8077
Got the password:
https://uploads.disquscdn.com/images/edaa36546fe62a5b9b8b8f25038ff7854ff8603d63713a87c2f7635a83cc7d02.png
I used the online editor:
https://uploads.disquscdn.com/images/965ae8491948b19ccc2c34ea5ca86a7549d5e208e3e5f2208b2898de3aef5fb2.png
0 = 77
2–3 to replace with 0000
468–475 = 04442CE4F2484D80
520–522 to replace with 000000
532–535 =1C31159D
536–537 to replace with 8080
Use the amiitool in Linux and pasted the results without the common on the end:
https://uploads.disquscdn.com/images/d0365755b8b7e593dddd81efa21d471c5060cec35541f5842d253ab2c96d4ec4.png
I have tried two Amiibo from nfc-bank.com. Am I missing something or screw it up?
The process you described seems correct, but I would also like to see the dump before your edits applied. It’s hard to tell seeing only the edited version.
Some people can’t get their tags working using the online tool. I would recommend you to try the amiitool with some hex editor on your PC. I’m also not sure about the Windows version of amiitool so better go with the one for Linux.
Let me know the results.
Unfortunately, I can’t get the Linux one to run. Only machine I have is an Raspberry Pi.
You can run Linux virtual machine in VirtualBox. There are pre-made VMs that you can download an run instantly. I checked this image and it works fine.
I am not super familiar with Linux and keep getting errors
Do I need to navigate to the directory that has the amiitool in it? Everytime I try to run ./amiitool I get an error that it’s not a command.
Yes, you should run the command in the directory where the amiitool binary is located.
https://uploads.disquscdn.com/images/d07914085f09143f66b4df4f566e47fdbd50a7642c7592ceb8861b2529e9f0d0.png
This is the point that I cannot get past.
Here is a screenshot of the folder
https://uploads.disquscdn.com/images/9187bfe162c8d34ce89a35deb7cbcfbe3cf6ae0b08a2433075c540c1e997e159.png
I really appreciate the assistance.
Just a guess, try to run
chmod +x amiitool
in the same directory.
That did it. First successful one this morning. Thanks so much!
I’m glad I could help! Happy cloning then!
Michael, please, remove the attached screenshots except for the one with generated password. I can not properly edit it with moderator tools.
Thanks!
I had some doubts about the formatting of the data code that I was not able to use that function on Linux, but I have other problems, can I have a sketch ready to upload? I was with a few tags and I would understand if my reader has problems
I’m pretty sure your reader is fine. Just make sure you follow instructions well and format the dump correctly.
I doubt is why I have often read errors even on the last empty tags, while the original amibo I never mistakes, though I fixed the formatting of the hexadecimal code
Can you show me an example of a blank tag read error?
What NFC reader do you have?
Here I just made 4 consecutive readings of the same empty tag
https://pastebin.com/JpgDM4Vr
Looks bad.
I had a weak reader an here is how I fixed it: http://imgur.com/a/MQvez
Just stick a metal coin in the middle of the antenna. Make sure the glue and the coin don’t touch any exposed metal contacts on the board.
Let me know if that helped 🙂
1) when i try to dump it, this is the code:
https://pastebin.com/DViZsDp6
2)I bought these:
http://www.ebay.it/itm/282386321390
3) to read and write using your sketch, before writing the tag, i edited it following your tutorial, but I’m using a downloaded dump. to do some trial use my amibo and I can read them perfectly
4) https://pastebin.com/DPgwXKsy
Thanks for your help
Looks interesting! I will check the details you provided and give you an update within 24 hours. Please refrain from writing new tags until I come with some solution 🙂
writing the tags then become unusable? I look forward to your response, thanks
Seems like you’ve pasted the dump the wrong way.
The hexdump should provide you with the output like this:
0x04, 0x64, 0xFC, 0x14,
0xBA, 0x8A, 0x49, 0x80,
0xF9, 0x48, 0x0F, 0xE0,
0xF1, 0x10, 0xFF, 0xEE,
…
and here is what you have in your sketch:
0x76F9E817,
0xBE772877,
0x04BF5C6F,
0x42754C80,
…
Can you notice the difference?
I can’t even guess what have you written to your tags in this case.
Try to reformat the input either by hand or using hexdump/other util.
Unfortunately, I am afraid that the tags you have already written are unrecoverable. Sorry for that :'(
I only bought them, others do not currently have it available, but occasionally I can write but then I can not read them. you can write me in private if I give my mail?
Currently I don’t understand the issue you have very well.
1. What do you mean by saying that you can write tags and then can’t read them?
2. Are you sure you have NTAG215 tags, not NTAG216 or any other tags?
3. Explain the process in detail. How do you write tags? How do you read them?
4. Give an example of the sketch that you use. You can share the Write_amiibo sketch leaving only first 5 and last 5 lines of the dump.
I guess that it would be helpful if we communicate in comments sharing our experience with others.
This is the empty tag dump:
https://pastebin.com/Cxa2qRz5
it’s not good?
Thanks for your help
You can’t tell whether the tag has a password set from the dump (it always shows zeroes even when it is actually set) but the rest seems to be clear enough. Do you have difficulties with this tag? Have you tried other tags?
MIFARE_Write() failed: A MIFARE PICC responded with NAK.
in the process of writing I get this error, how do I fix?
Hi Dan!
Seems like you’re trying to write to a password protected tag, which means that this tag is 100% not blank. Try to use another tag.
Hi, thanks for providing this tutorial, seems like a neat way of producing amiibos with Arduinos! I have one problem and one additional question:
The problem: With the MFRC522 library (v1.3.3 from March 23rd, 2017) I’m getting these error messages when trying to write the dump to the NFC Tag. Could you help me figuring out what’s going on?
no1_amiibo:21: error: redefinition of ‘MFRC522 mfrc522’
MFRC522 mfrc522(SS_PIN, RST_PIN); // Create MFRC522 instance
/mypath/Write_amiibo/no1_amiibo.ino: In function ‘void setup()’:
no1_amiibo:23: error: redefinition of ‘void setup()’
void setup() {
The additional question 🙂 I’m trying to clone a BotW:Archer-Link amiibo. As in your tutorial, the dump (and its decoded version) have 540 Bytes. I found the Archer-Link-data also on the net (I believe it’s the regular source for these), but found the data to have 572 Bytes. Is the tutorial still applicable to these dumps?
Hi Ben,
seems like you’re using my sketch in a weird way, maybe even pasting the code into another sketch.
Try to download the Write_amiibo.ino file from my repository and open it in Arduino IDE.
Regarding the 572 Bytes dumps, yes the tutorial is still applicable. You will just need to manually delete last 32 bytes from the dump.
The last 32 Bytes are some extra data which, anyway, can not be fit into the NTAG215 NFC tag.
Hey, thanks a lot for your advice! Turns out, I made a rookie mistake: Since I wanted to preserve the original Write_amiibo.ino, I placed a copy Write_amiibo01.ino in the same folder, which (of course) didn’t work.
Tonight I was able to clone my own Archer Link and to create a working tag with a dump from a Guardian amiibo, and paid only a few bucks for the Arduino shield and the tags! Thanks again!!
would this work with the adafruit 523 board? https://www.adafruit.com/products/789
i mean PN532
No, this module is based on another chip which requires different library. But I guess that you can relatively easily rewrite my sketches to work with your module.
got a bad board but the replacement works. awesome work man! great instructions
Hi, thanks for the feedback and happy cloning! 🐑 🐑
one other thing to note. i was using that link for the password generator for my first few runs and found that the codes it spits out aren’t correct all the time. the script you provided a link for has worked no problem tho. i’ve left a note for the web site contact as well.
Where would you start to modify your code to work on the adafruit PN532 shield?
I would start from rewriting the Dump_amiibo sketch, trying to find compatible functions and constrictions for initialisation and reading the tag.
Seems like ntag2xx_read, sketch that comes with the library, may provide all the required data.
I get nothing but errors…
1 – mfrc522.PCD_DumpVersionToSerial(); gives out an error (posted it on your github issues section)
2 – 80% of the lines being written, give the following error:
riting data into page 129 …
1E 85 FB 9E MIFARE_Write() failed: Error in communication.
Would greatly appreciate your help with this.
Thanks
Hi Ivy,
thanks for your attention to my article!
1. Seems like you may have an old/incomplete version on the library. For more info check my reply on github.
2. I haven’t ever seen the error like this but it seems like you might have removed the tag from the NFC shield too early. Try to hold it longer. You may also share your sketch via https://gist.github.com/. Maybe there is a typo in it.
Thanks for the awesomely quick response, I didn’t remove the tag at all until the code said to remove it. I might be using an older version of the library indeed, I will give it a try.
It starts writing the tag up until line 20, then the communication timeout appears… I will look at your response on github.
Thanks again!
Hope you didn’t waste too much tags 😯
Try to update the library and good luck!